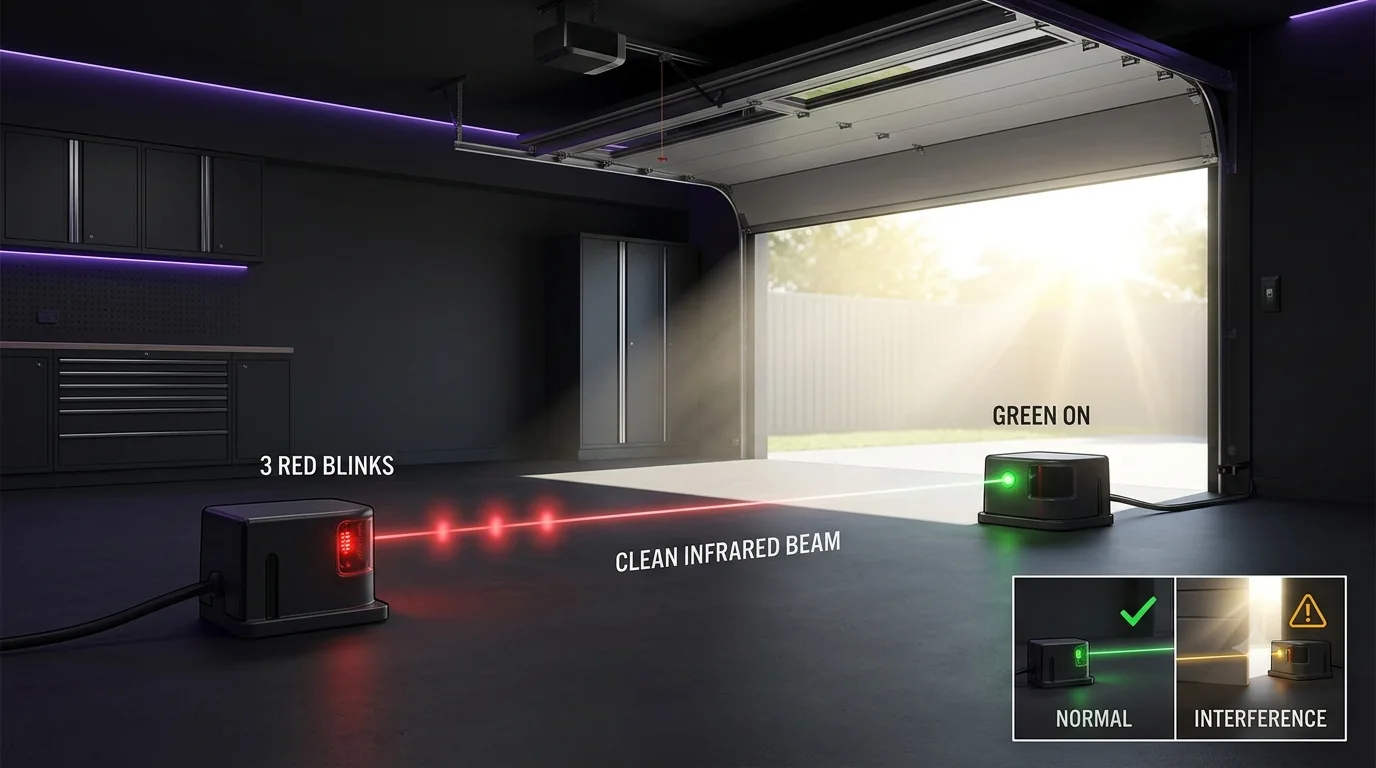
In Genie’s Safe-T-Beam self-diagnostic chart, three red blinks followed by a pause with the green LED on indicates that the sensor is receiving interference. Look for a repeatable interference source while keeping alignment and wiring checks in view.
Diagnostic snapshot
- Answer
- On Genie's documented Safe-T-Beam diagnostic chart, three red blinks indicates interference affecting the sensor system rather than a normal solid-LED beam state.
- Check first
- Remove nearby interference sources, verify that the two sensors face each other, and re-check the LED pattern before replacing parts.
- Strong clue
- A repeatable three-blink pattern after the beam path is clear is more useful than a generic 'door won't close' symptom because it narrows the fault branch.
- Model / generation note
- Use the Safe-T-Beam chart for the exact sensor generation on your Genie opener; do not import Chamberlain amber/green LED logic into Genie diagnostics.
Read Genie Safe-T-Beam red and green LEDs together
What is each Safe-T-Beam eye reporting at the same time?
Record both LED states before choosing a blink-code branch.
Genie identifies the red LED unit as the source/transmitter and the green LED unit as the receiver. A blink count is not enough by itself: several diagnostic branches change depending on whether the other LED is steady, off or also abnormal.
This exact manufacturer signal can feed the following diagnostic family. Keep the original code or LED pattern when troubleshooting.
What you are likely to notice
- The red Safe-T-Beam source LED blinks three times, pauses and repeats
- The green sensor LED remains on
- The closing problem may be intermittent or change with environmental conditions
Check these in order
1. Confirm the complete pattern
Count three red blinks, the pause, and confirm the green LED is on. Genie uses the companion green LED to distinguish this branch from other Safe-T-Beam faults.
2. Remove obvious beam-path issues first
Clean both lenses and remove anything crossing the beam so a simple obstruction is not confused with interference.
3. Look for a repeatable interference source
Genie identifies receiver interference as the likely condition. Note whether the fault appears only at certain times or after a nearby light/electronic device is switched on, then retest with the suspected source removed when practical.
4. Re-test the safety system after the pattern clears
Both sensor LEDs should return to the normal steady state. Then perform the Safe-T-Beam reversal test before resuming normal use.
Three blinks are specifically an interference branch
Genie's self-diagnostic chart separates three red blinks with the green LED on from the more common two-blink alignment/obstruction branch. That distinction matters because repeatedly re-aiming sensors may not solve a receiver that is being affected by an external interference source.
Before chasing interference, still confirm the lenses are clean and the beam path is clear. The aim is to remove simple variables first, then look for a pattern tied to lighting, electronics or time of day.
How to look for interference without inventing a cause
Change one condition at a time. If the three-blink pattern appears only when a nearby device or light is on, turn that device off and observe whether the Safe-T-Beam state changes. A repeatable before/after result is more useful than guessing from proximity alone.
If no external source can be identified and the pattern persists, use Genie support or the exact opener manual. Do not bypass Safe-T-Beam to keep the door closing; the safety system needs to operate correctly.
Three blinks is the interference branch
Genie's Safe-T-Beam self-diagnostic chart assigns three repeating red blinks with the green LED ON to interference at the receiving sensor. That separates it from two blinks, where alignment/obstruction or sensor wiring may be involved, and from four blinks, where the source-pulse branch takes over. Keep the blink count and green state together in your notes.
Interference diagnosis is strongest when the state changes predictably with the environment while sensor position and wiring remain unchanged. Look for direct sunlight, another nearby photo-eye system or a new infrared/electronic source that coincides with the failure. If you cannot reproduce the relationship, avoid permanently repositioning sensors based on a guess; return to the exact LED pattern and model documentation.
- 3 red blinks + green ON: interference branch.
- 2 blinks: return to alignment/obstruction/wiring logic.
- 4 blinks: source-not-sending-pulses/source fault branch.
When handing off a three-blink case, include the repeating red count, green-ON state and any environment change that reliably starts or stops the pattern. If the pattern does not respond to shading or removal of a suspected interference source, say so. Negative evidence matters because it prevents a permanent sensor relocation based only on a guess about sunlight or cross-talk.
Stop DIY troubleshooting when…
- The pattern persists with a clear beam and no identifiable interference source
- Sensor wiring is damaged
- The sensor bracket cannot maintain alignment
- The door has a separate mechanical fault
Garage door springs, cables and a falling/unbalanced door can store or release dangerous force. Those are door-system problems, not just opener settings.
Common questions
What does three red blinks with green on mean on Genie Safe-T-Beam?
Genie's diagnostic chart identifies sensor receiving interference for that exact pattern.
Is three blinks the same as sensor misalignment?
No. Genie uses two red blinks with green on for the alignment/obstruction/sensor branch; three red blinks with green on is the interference branch.
Should I bypass the sensors if interference keeps returning?
No. Safe-T-Beam is a required protective system. Identify and correct the cause or use model-specific support.
Manufacturer sources used
These links are the factual baseline for the diagnostic claims above. Model-specific manuals can supersede general guidance.